AI Assisted Code Review

Based on open source made available as open web service in Eyevinn Open Source Cloud we can have AI to assist with code reviewing of submitted pull requests to a GitHub repository.

The AI Code Reviewer is an open source project that provides an API and user interface to review code in a public GitHub repository. It analyzes code for quality, best practices and potential improvements, providing actionable feedback to improve a code base. This is achieved by carefully prompting a GPT4 model to perform the task and return a structured response with scores and suggested improvements.
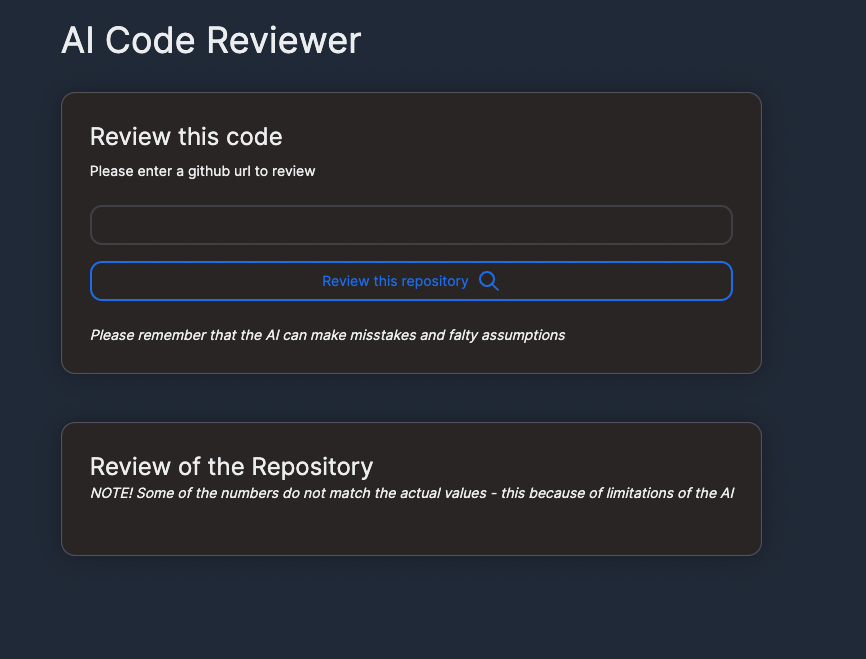
This project has been made available as an open web service in Eyevinn Open Source Cloud which means that you can instantly start to integrate this into your solution.

AI Code Review GitHub Action

For example, we might want to incorporate this AI Code Reviewer in our Pull Request workflow, and use this to provide an automated first review of all opened pull requests. It could add a comment on overall score and suggested improvements.

In order to add this to our GitHub workflow we need a GitHub action to perform this task based on this open web service in Eyevinn Open Source Cloud. We will create a GitHub action that uses the client libraries for Eyevinn OSC to create an AI Code Reviewer instance.

core.info('Setting up Code Reviewer');
const ctx = new Context();
let reviewer = await getEyevinnAiCodeReviewerInstance(ctx, 'ghaction');
if (!reviewer) {
  reviewer = await createEyevinnAiCodeReviewerInstance(ctx, {
    name: 'ghaction',
    OpenAiApiKey: '{{secrets.openaikey}}'
  });
  await delay(1000);
}
core.info(`Reviewer available, requesting review of ${gitHubUrl.toString()}`);

These lines of code will create an instance called “ghaction” if it does not already exists. When that is available we can use the API that this service provides to perform the actual code review. The following lines of codes takes care of this.

const reviewRequestUrl = new URL('/api/v1/review', reviewer.url);
const sat = await ctx.getServiceAccessToken('eyevinn-ai-code-reviewer');
const response = await fetch(reviewRequestUrl, {
  method: 'POST',
  headers: {
    Authorization: `Bearer ${sat}`,
    'Content-Type': 'application/json'
  },
  body: JSON.stringify({
    githubUrl: gitHubUrl.toString()
  })
});
if (response.ok) {
  const review = await response.json();
  return review;
} else {
  throw new Error('Failed to get review');
}

We package this together into a GitHub action and makes it available on the GitHub action marketplace.

Add review to pull request workflow

Now it is time to add this to our pull request workflow in GitHub. We add a step to review the branch for the pull request using the GitHub action we created. The input variable “repo_url” contains the URL to this branch and in addition we need to provide the access token to Eyevinn OSC as an environment variable.

  - name: Review branch
    id: review
    uses: EyevinnOSC/code-review-action@v1
    with:
      repo_url: ${{ github.server_url }}/${{ github.repository }}/tree/${{ github.head_ref}}
    env:
      OSC_ACCESS_TOKEN: ${{ secrets.OSC_ACCESS_TOKEN }}

Next step is to take the outputs “score” and “suggestions” of this step and add this as a comment to the pull request.

  - name: comment
    uses: actions/github-script@v7
    with:
      github-token: ${{secrets.GITHUB_TOKEN}}
      script: |
        github.rest.issues.createComment({
          issue_number: context.issue.number,
          owner: context.repo.owner,
          repo: context.repo.repo,
          body: 'Code review score: ${{ steps.review.outputs.score }}\n${{ join(fromJSON(steps.review.outputs.suggestions), ', ') }}'
        })

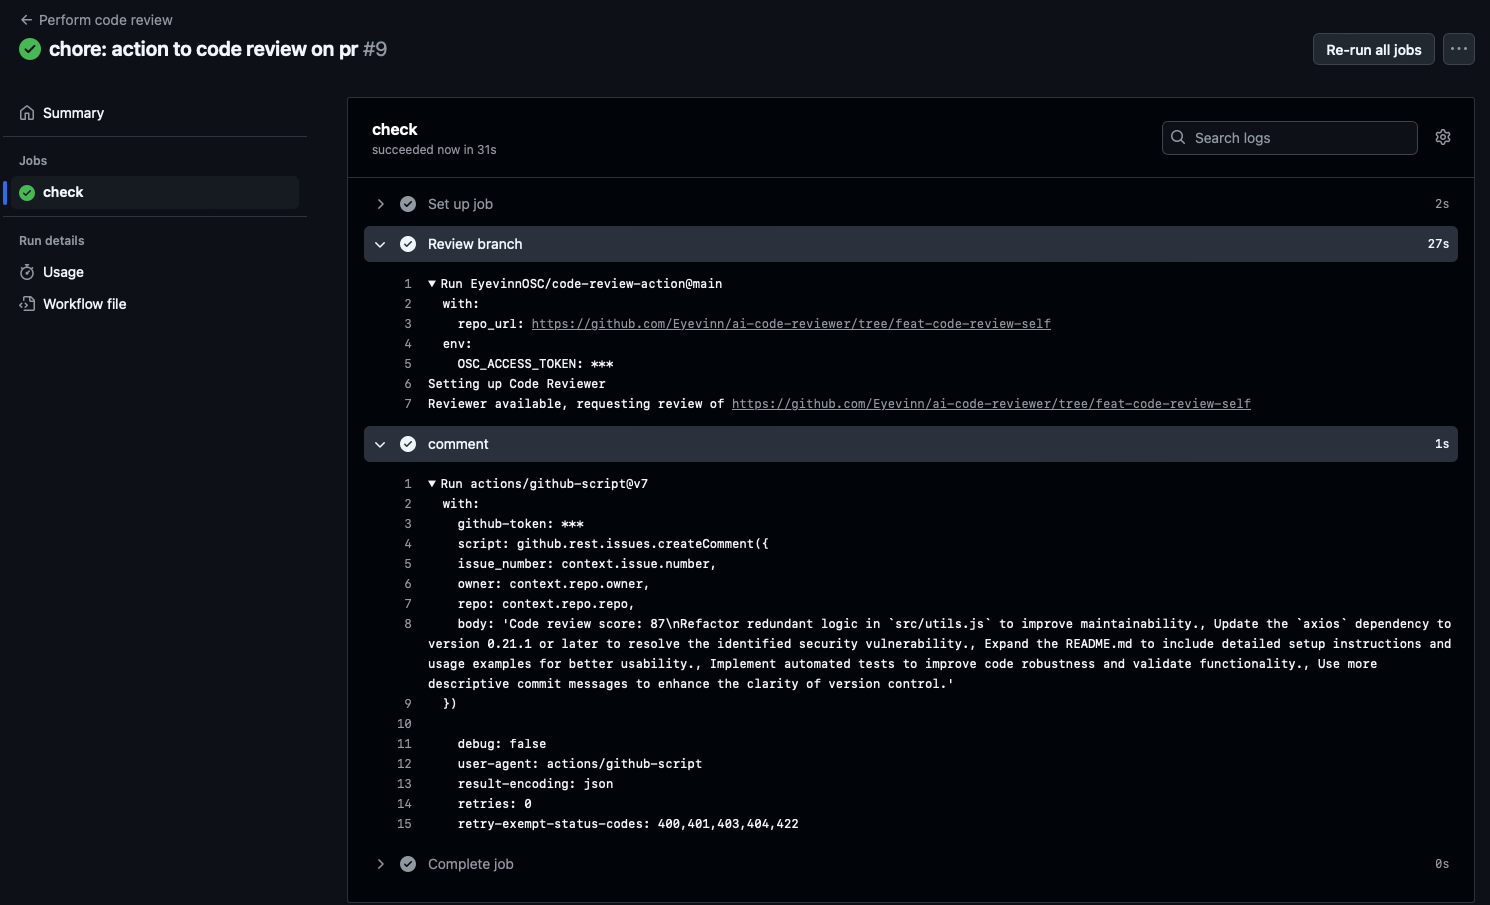
When a pull request is open the workflow is run and result of the code review is posted as a comment to the pull request.
Conclusion

This is an example on how you can integrate open web services to enhance your software development processes. We are continuing our journey to advance and democratize web services through open source and a sustainable business model for creators.

Empowers Developers to Integrate Open Web Services into their Applications

This blog post serves as an example of how our platform empowers developers and businesses to seamlessly integrate open source as web services into their applications and services. Build applications and solutions on these open web services to avoid being locked in to a single web services vendor.

In this example we will build a NodeJS application that uses an open web service to store application configurations. Before we begin and to follow this guide you will need to signup with Eyevinn Open Source Cloud to get the personal access token to access available web services. Navigate to the Web Console and register with your email. Signup is free and on the free plan you have access to create one open web service at the time. Upgrade to startup or business plan gives you access to use more open web services at the same time. Create a tenant and you are good to go.

You can now obtain the access token by navigating to Settings / API in the web console. Copy this and store in your shell’s environment in the environment variable OSC_ACCESS_TOKEN.

% export OSC_ACCESS_TOKEN=access-token-copied-above

Setup your Node/Typescript project and install the Typescript client SDK.

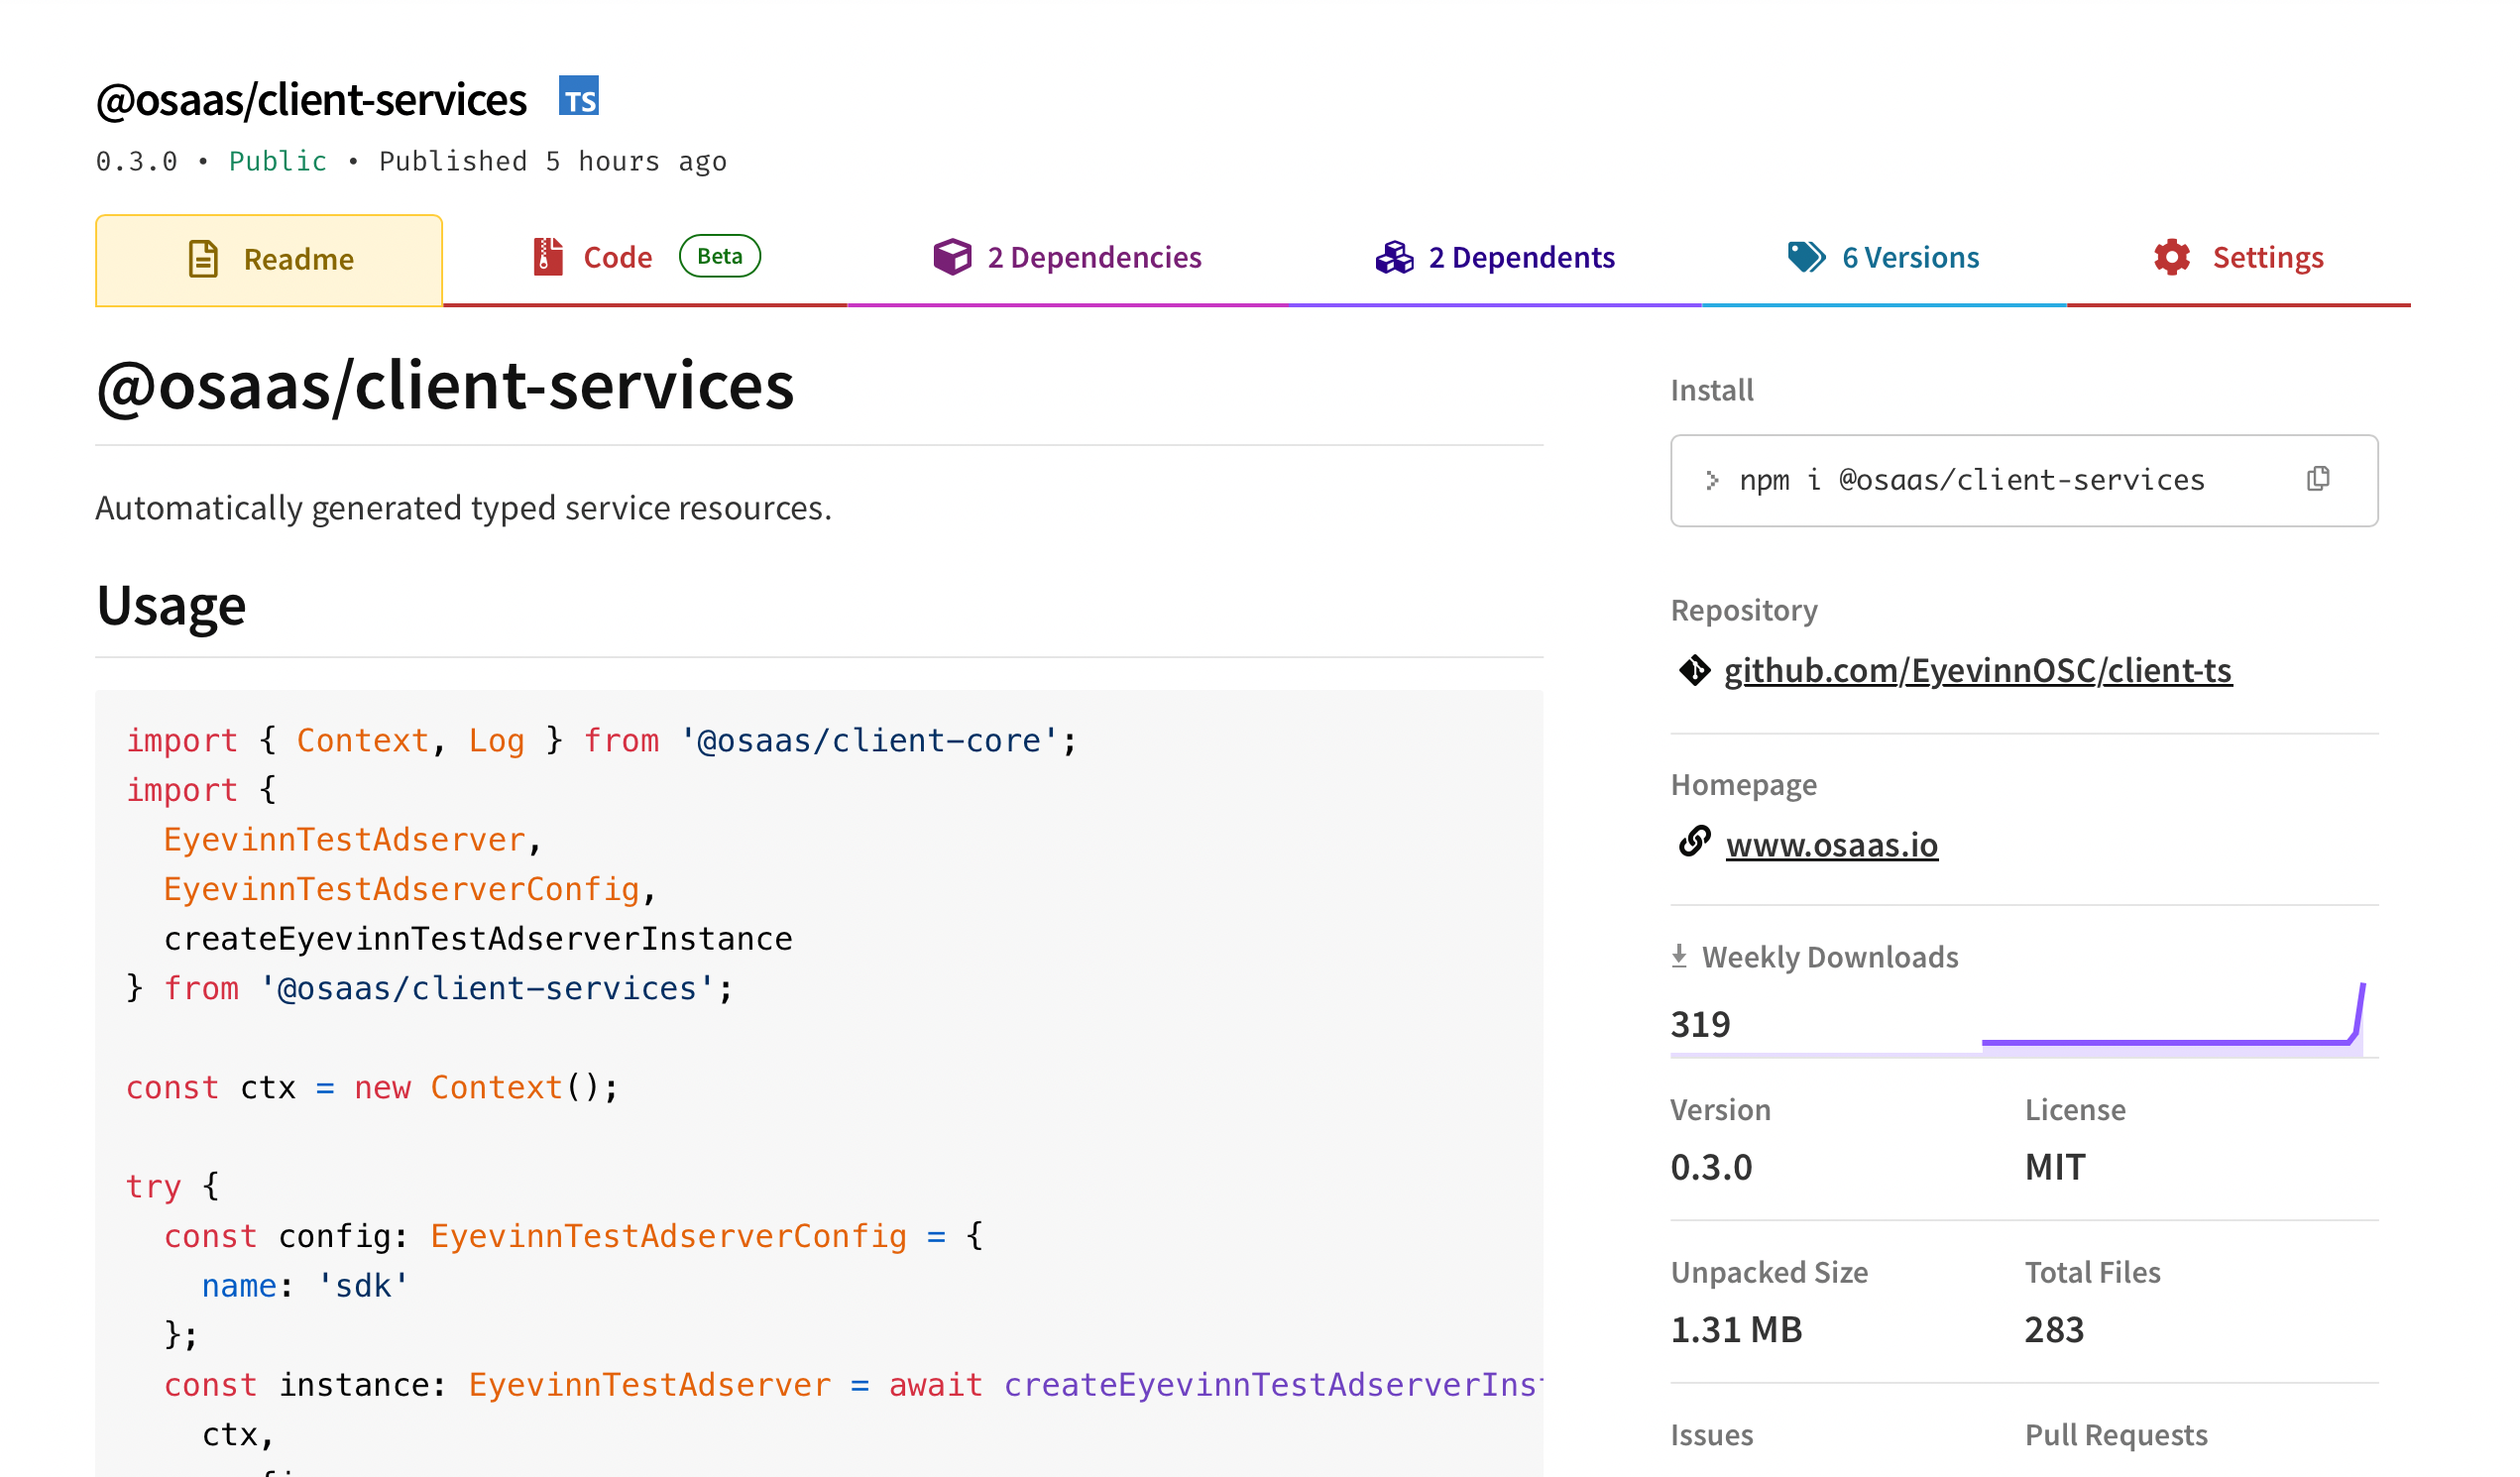
% npm install --save @osaas/client-services

Create a main function that will read a config value and if not existing it will save a default.

async function main() {
  const ctx = new Context();
  const service = await setup(ctx);
  console.log('Configuration UI available at:', service.url);
  let value = await readConfigVariable(service, 'foo');
  if (!value) {
    await saveConfigVariable(service, 'foo', 'default');
    value = await readConfigVariable(service, 'foo');
  }
  console.log(`Config value: ${value}`);
}

Let us go through in more detail what above does.

This line will read the OSC_ACCESS_TOKEN environment variable from your shell and create a context for accessing the Eyevinn Open Source Cloud platform.

const ctx = new Context();

Then we will setup the open web services that we will need.

const service = await setup(ctx);

In return we will get the open web service handling the configuration variables and a URL to the configuration service web user interface. In this web interface you can manage the values of the configurations.

  let value = await readConfigVariable(service, 'foo');
  if (!value) {
    await saveConfigVariable(service, 'foo', 'default');
    value = await readConfigVariable(service, 'foo');
  }
  console.log(`Config value: ${value}`);

We try to read a variable called foo and if it does not exists we will create a variable with a default value. We then print the value to the console.

Now let us take a closer look at the function setup().

In this function we create the open web service for managing configuration variables. An open web service created from the open source project App Config Svc available on GitHub. This service requires a Redis database for storing and accessing the values.

For the database we will then create an instance of the Valkey.io open web service that provides a Redis compatible API. We obtain the IP and ports to this instance and creates a Redis URL that we provide the application config service we want to create.

async function setup(ctx: Context) {
  const configServiceAccessToken = await ctx.getServiceAccessToken(
    'eyevinn-app-config-svc'
  );
  let configService: EyevinnAppConfigSvc = await getInstance(
    ctx,
    'eyevinn-app-config-svc',
    'example',
    configServiceAccessToken
  );
  if (!configService) {
    const valkeyInstance = await createValkeyIoValkeyInstance(ctx, {
      name: 'configstore'
    });
    const redisUrl = await getRedisUrlFromValkeyInstance(
      ctx,
      valkeyInstance.name
    );
    configService = await createEyevinnAppConfigSvcInstance(ctx, {
      name: 'example',
      RedisUrl: redisUrl
    });
  }
  return configService;
}

The functions to save and read configuration variables are written as followed. Basically just using the HTTP API that the configuration service provides for writing and reading variables.

async function saveConfigVariable(service: EyevinnAppConfigSvc, key: string, value: string) {
  const url = new URL('/api/v1/config', service.url);
  const response = await fetch(url.toString(), {
    method: 'POST',
    headers: {
      'Content-Type': 'application/json'
    },
    body: JSON.stringify({ key, value })
  });
  if (!response.ok) {
    throw new Error(`Failed to save config: ${response.statusText}`);
  }
}

async function readConfigVariable(service: EyevinnAppConfigSvc, key: string) {
  const url = new URL(`/api/v1/config/${key}`, service.url);
  const response = await fetch(url.toString(), {
    method: 'GET',
    headers: {
      'Content-Type': 'application/json'
    }
  });
  if (!response.ok) {
    return undefined;
  }
  const data = await response.json();
  return data.value;
}

This example shows you how you can integrate open web services easily in your applications and services. More examples are available in this GitHub repository.

Can Claude create a VOD streaming package for you?

The question in the title is of course a bit rhetorical. Of course Claude can. In this post I am going to describe how that works and how you can try this out.

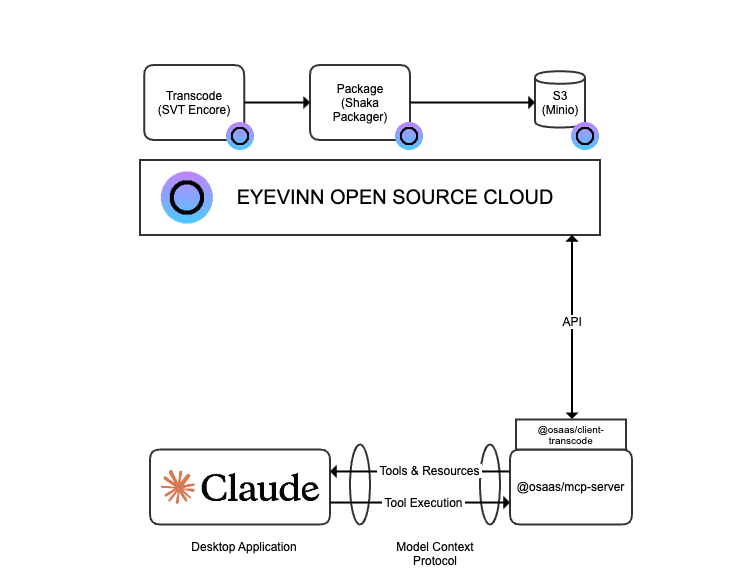
Claude is an AI assistant built by Anthropic that is trained to have natural, text-based conversations, and first model was released in March 2023. Anthropic released in November 2024 a specification for the Model Context Protocol (MCP) that is an open protocol to enable seamless integration between LLM applications and external data sources and tools. MCP provides a standardized way to connect LLMs with the context they need.

MCP is a protocol that enables secure connections between host applications, such as Claude Desktop, and local services. Programs like Claude Desktop, IDEs or AI tools access MCP servers that are lightweight programs that exposes specific capabilities through the standardized Model Context Protocol.

We have developed and open sourced an MCP server for Eyevinn Open Source Cloud. An MCP server provides tools and resources and we currently provide tools for video on-demand streaming but more will be added by us our hopefully the open source community.

In the demonstration video below I show how I can have Claude to setup a video on-demand preparation pipeline and create a video on-demand file for streaming from a video file available online.


Install

If you want to try this out yourself you can follow these steps. A prerequisite is that you have an account on Eyevinn Open Source Cloud and at least 6 services available on your plan.

1. Download and install Claude Desktop.
2. In the Eyevinn OSC web console go to API settings (in Settings > API settings)
3. Copy the Personal Access Token
4. add the following to your claude_desktop_config.json:

{
  "mcpServers": {
    "eyevinn-osc": {
      "command": "npx",
      "args": ["-y", "@osaas/mcp-server"],
      "env": {
        "OSC_ACCESS_TOKEN": "YOUR_PERSONAL_ACCESS_TOKEN"
      }
    }
  }
}

5. Restart Claude

If everything is correctly installed you should see an icon of a hammer in the bottom of the chat input.

Now you can ask Claude to create a VOD from a file that you have available online as shown in the video above.

Client SDK

This MCP server uses the Typescript client SDK for Eyevinn Open Source Cloud. With this SDK you can create and remove instances and automate what you can do in the web console. Here is an example of how to create a VOD package using the client SDK which is basically what one of the tools currently can do.

import { Context, Log } from '@osaas/client-core';
import { createVod, createVodPipeline } from '@osaas/client-transcode';

async function main() {
  const ctx = new Context();

  try {
    const ctx = new Context({ environment });
    Log().info('Creating VOD pipeline');
    const pipeline = await createVodPipeline(name, ctx);
    Log().info('VOD pipeline created, starting job to create VOD');
    const job = await createVod(pipeline, source, ctx);
    if (job) {
      Log().info('Created VOD will be available at: ' + job.vodUrl);
    }
  } catch (err) {
    Log().error(err);
  }
}

main();

This gives you an example of what you can do and the possibilities are “endless”. It feels as it is only creativity that stands in the way of what you can do.

Share your ideas either in the comments below or with a contribution to the Eyevinn OSC MCP server that is open source. Be creative!