An Agent-first Web Service Platform based on Open Source

Eyevinn Open Source Cloud (OSC) makes it easier to use open source in solutions and quickly turn ideas into working implementations. Works with AI assistants and development environments to leverage open source effectively. The OSC Architect helps design solutions by combining open web services with large language models, and IDE integration to assist with developing the connections between open web services.

Eyevinn Open Source Cloud (OSC) not only reduces the barrier to use open source in a solution, but it also reduces the barrier to go from idea to a full working solution. With OSC integrated with your AI-assistant and AI-powered development environments (IDE) they can help you utilize the full power of open source when developing your solution.

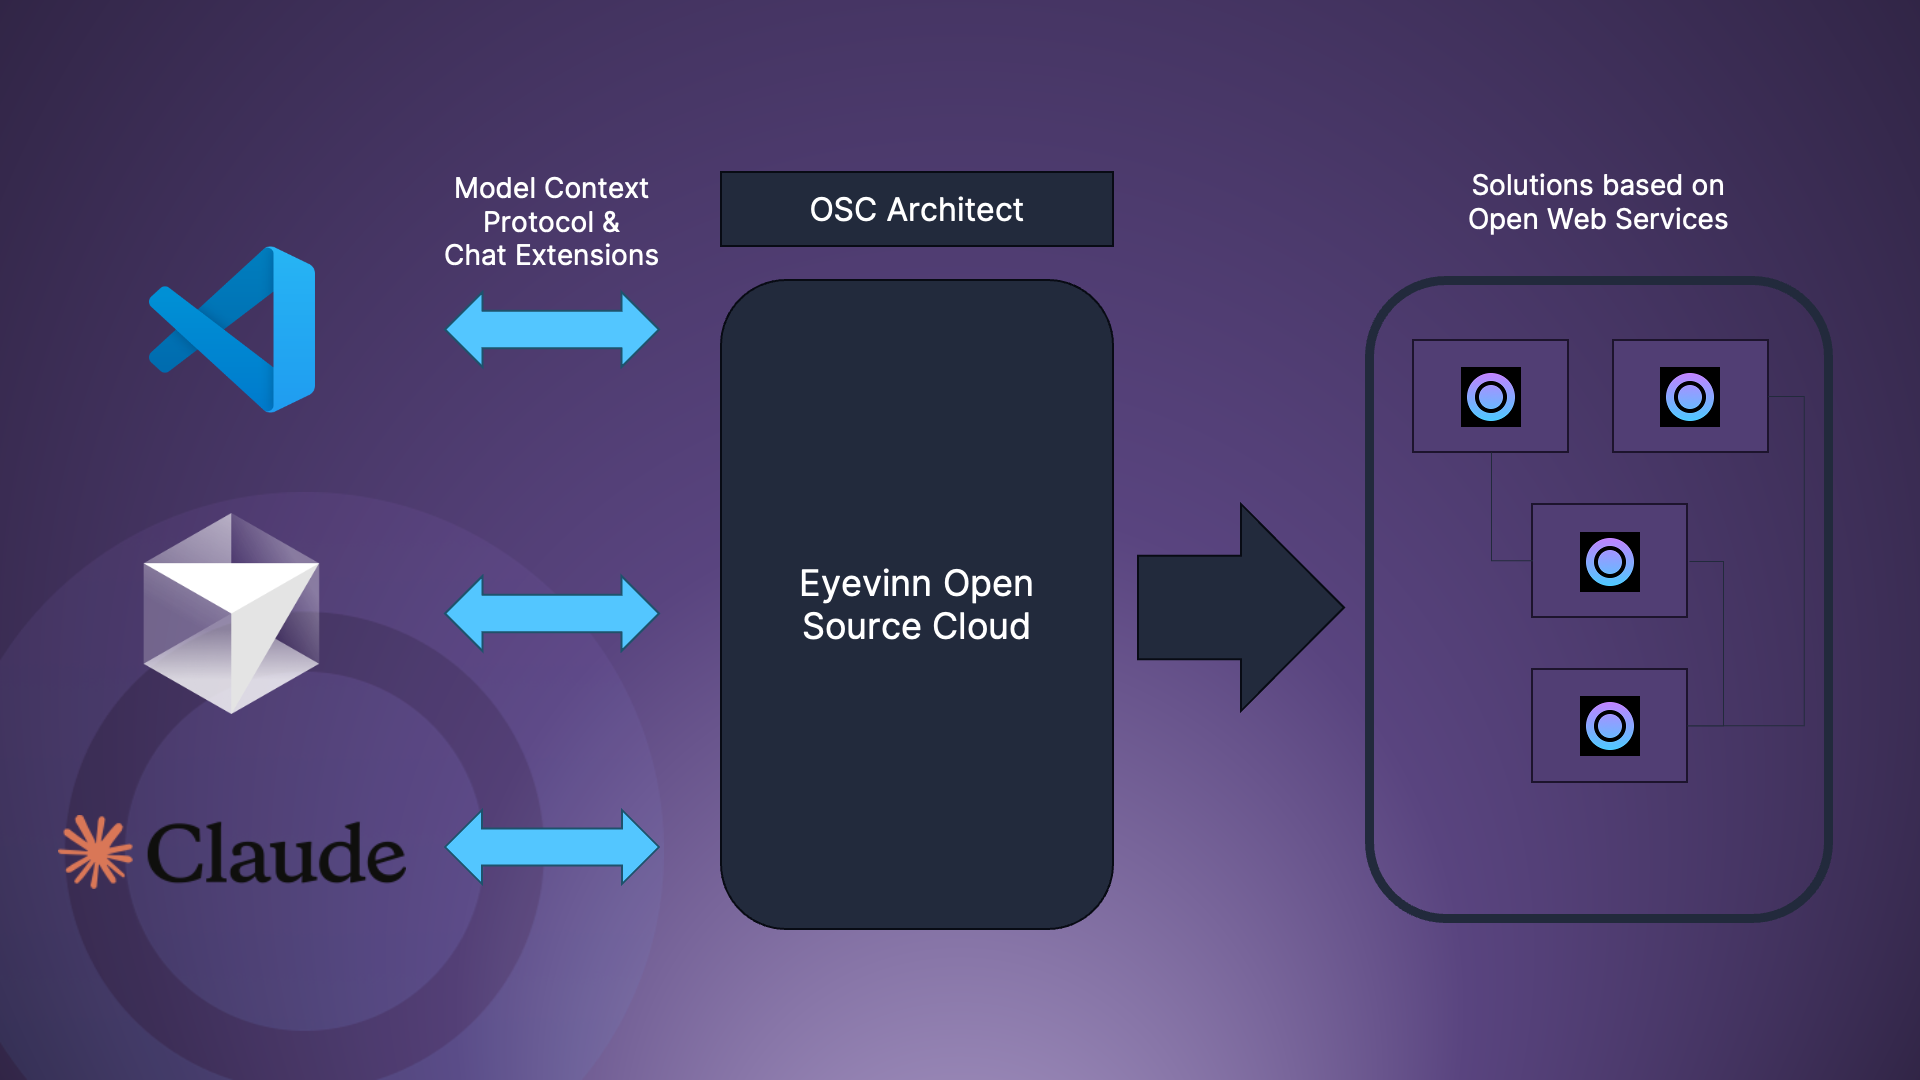
With the knowledge base of available open web services and their potential combined with large-language models the OSC Architect supports you designing a solution. And having the OSC Architect integrated in the IDE it can assist you with developing the “glue” that connects the open web services in the solution.

A Model Context Protocol remote endpoint is available to provide OSC context and the ability to administrate your running services in OSC using your favorite AI application (or IDE for that matter).

Some examples of what the OSC Architect can assist you with are:

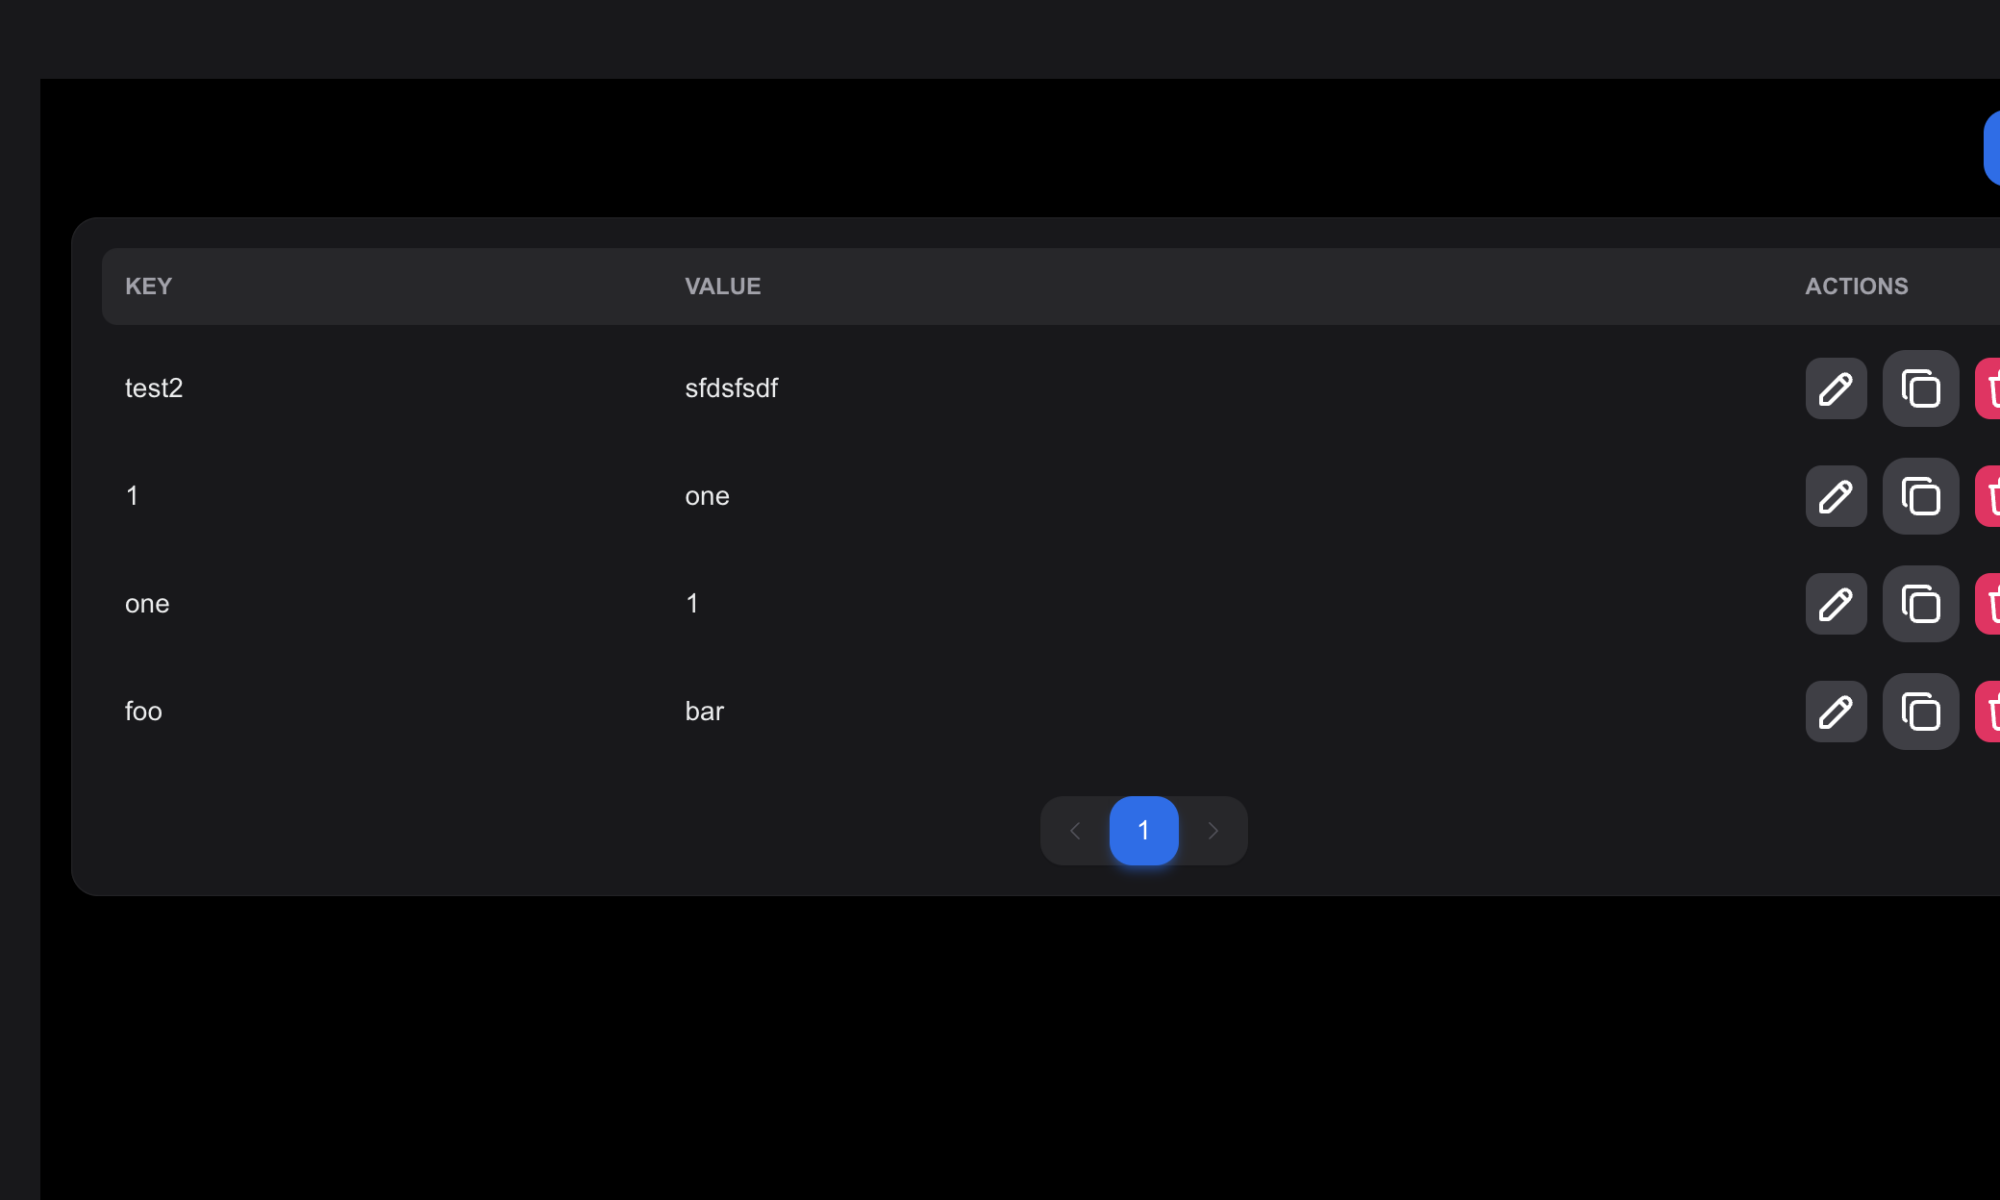
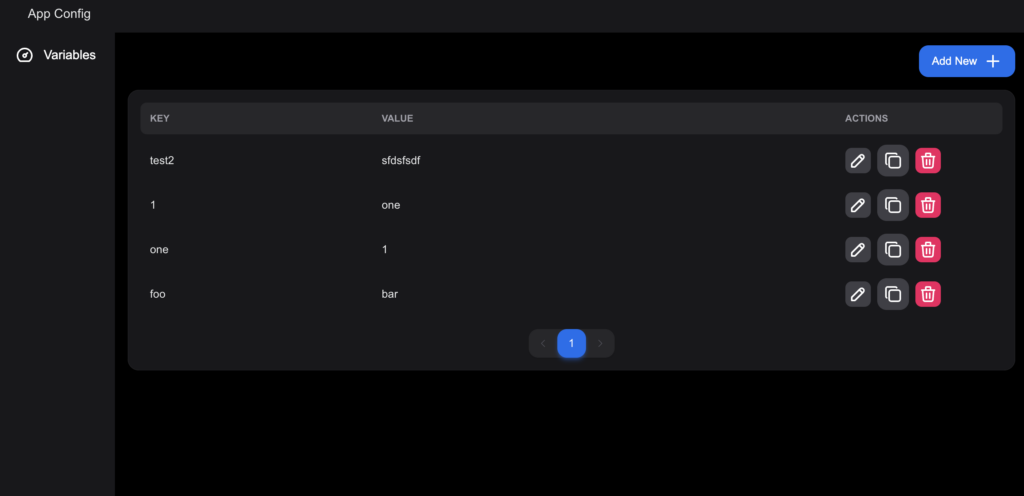
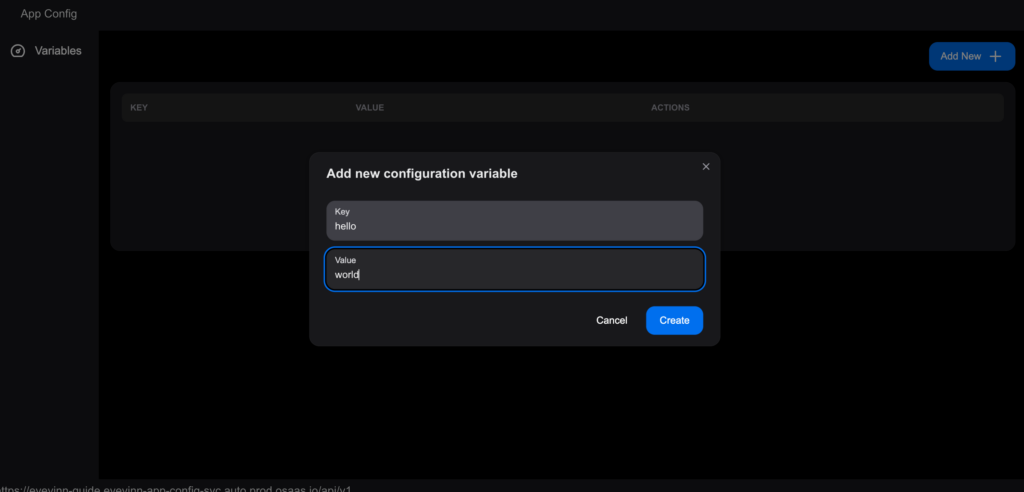
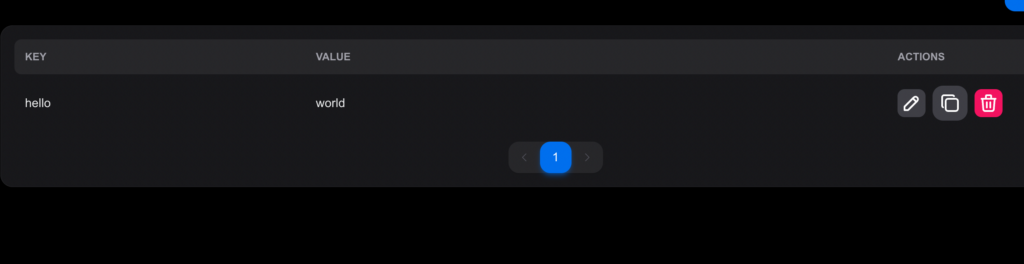
  • Suggest code to setup a NoSQL database running in the cloud based on open web service in OSC, and the code the manage the documents in the database (create, update, read and delete).
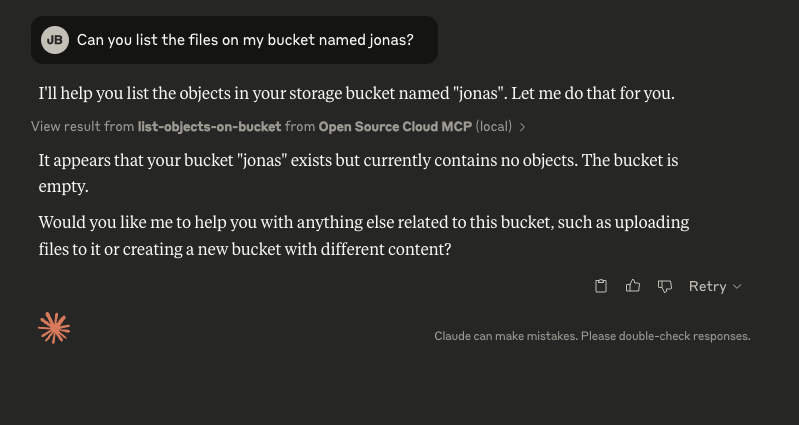
  • Suggest code for uploading and handling large files in a bucket on a open storage service in OSC.
  • Help you design a solution for handling user registration and authentication
  • Guide you to building a solution for automatically synchronizing a RAG vector store with new and updated documents.
  • Develop a solution for preparing and creating video files for VOD streaming including automatic subtitle generation.

To integrate OSC in your AI application using Model Context Protocol add the following MCP server to your application’s MCP configuration.

{
  "mcpServers": {
    "remote-mcp-osc": {
      "command": "npx",
      "args": ["-y", "@osaas/client-mcp"],
      "env": {
        "OSC_ACCESS_TOKEN": "[osc-access-token]"
      }
    }
  }
}

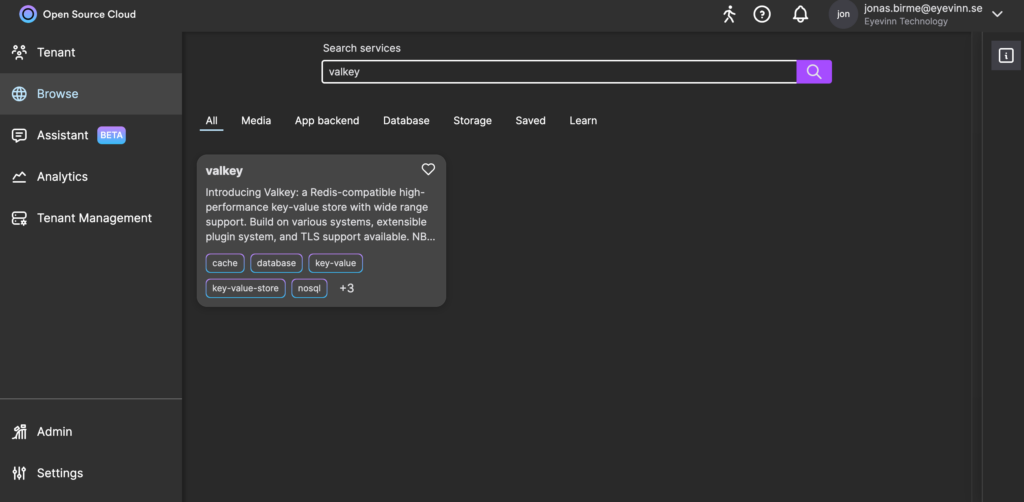
You find the OSC access token in the Open Source Cloud web console under Settings / API.

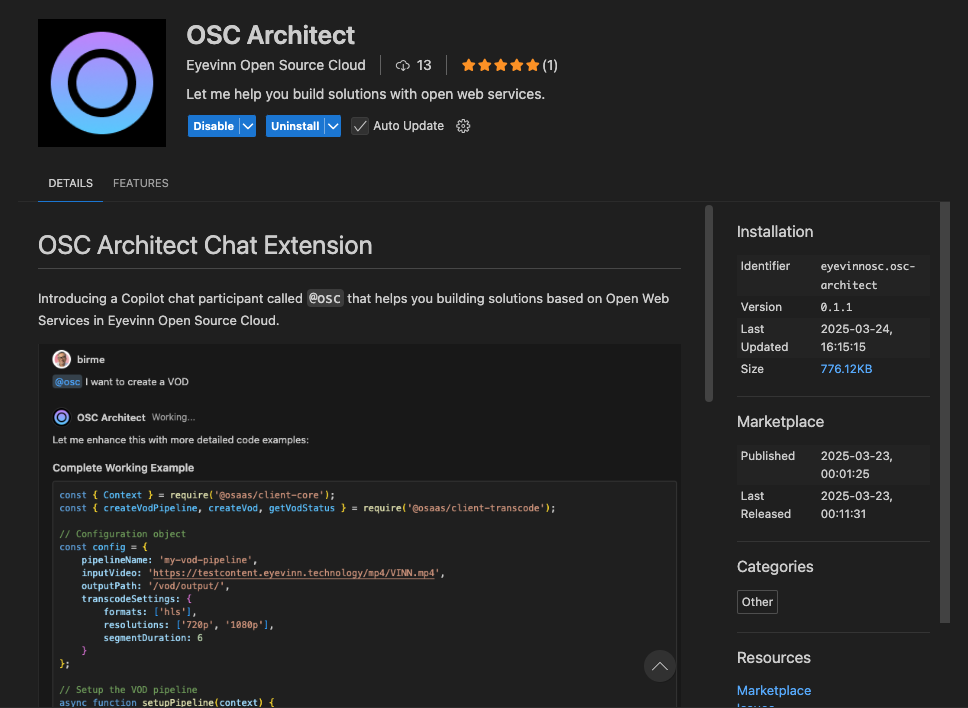
And to add the OSC Architect to GitHub Copilot chat in Visual Studio Code install the OSC Architect Chat Extension.

With OSC in the center of your development environment you can fully utilize the great power of open source out there and a solution free from vendor lock-in.

Stronger Independence with Open Web Services

Do you feel it is time to start considering how to be less dependent on one single provider of cloud web services for your solution but don’t know how or where to start?

In this article we give you a starting point by describing how to move the message queue service in your solution to a service based on open source instead. With a service based on open source you can at a later step move this to your own infrastructure.

Open source as a service

The SmoothMQ project is a message queue that is a drop-in-replacement for SQS. It is open source and there is nothing preventing you from hosting it in your own private or public cloud infrastructure. To reduce the barrier to move to a solution based on SmoothMQ and open source in general we developed Eyevinn Open Source Cloud. A service where open source projects are made available as a service, an open web service, and SmoothMQ is one of those.

This makes it possible for you to start shifting your messaging over to open source message queues without having to build up a self-hosting infrastructure for it first.

Feasibility study with open web service

Start with a practical feasibility study in the form of a proof-of-concept by taking a part of the workloads that your current web service handles and place it on a SmoothMQ open service. Develop an adapter that consumes messages from your current web service queue and place it on a SmoothMQ instance in Eyevinn Open Source Cloud. This adapter can be deployed and running as a Web Runner. Then have some of your workers to consume work from the SmoothMQ message queue. This gives you the opportunity to validate, identify gaps and estimate the effort to make the move without having to invest time and money in building up your own infrastructure first.

By now you should have the necessary information to scope and initiate a transition project.

The transition project can use the same approach by off-loading some of the workloads from your current web service and shift it over to open web services. Gradually make the move under the comfort that you can always fall back to current web service if you discover any problems along the way. Also, you have not had to make any large up-front infrastructure investments before you know that everything will work.

Move from open web service to self-hosted infrastructure

When you are comfortable that the open source based solution works you can start the project to build up your own infrastructure for this. As the open web service is open source and not bound to either Eyevinn Open Source Cloud or its underlying infrastructure you can run the very same software in your infrastructure. What provider of cloud (or on-prem) infrastructure you choose is fully up to you.

No larger modifications to the open web service based solution would be necessary as it is the very same software running.

Stronger independence

Now you are in a stronger position as the video transcoding part of your media solution is not bound to one single vendor. To further strengthen your independent position, you can take on the next component of your solution where there might exist an open source equivalence and use the same approach.

Empowers Developers to Integrate Open Web Services into their Applications

This blog post serves as an example of how our platform empowers developers and businesses to seamlessly integrate open source as web services into their applications and services. Build applications and solutions on these open web services to avoid being locked in to a single web services vendor.

In this example we will build a NodeJS application that uses an open web service to store application configurations. Before we begin and to follow this guide you will need to signup with Eyevinn Open Source Cloud to get the personal access token to access available web services. Navigate to the Web Console and register with your email. Signup is free and on the free plan you have access to create one open web service at the time. Upgrade to startup or business plan gives you access to use more open web services at the same time. Create a tenant and you are good to go.

You can now obtain the access token by navigating to Settings / API in the web console. Copy this and store in your shell’s environment in the environment variable OSC_ACCESS_TOKEN.

% export OSC_ACCESS_TOKEN=access-token-copied-above

Setup your Node/Typescript project and install the Typescript client SDK.

% npm install --save @osaas/client-services

Create a main function that will read a config value and if not existing it will save a default.

async function main() {
  const ctx = new Context();
  const service = await setup(ctx);
  console.log('Configuration UI available at:', service.url);
  let value = await readConfigVariable(service, 'foo');
  if (!value) {
    await saveConfigVariable(service, 'foo', 'default');
    value = await readConfigVariable(service, 'foo');
  }
  console.log(`Config value: ${value}`);
}

Let us go through in more detail what above does.

This line will read the OSC_ACCESS_TOKEN environment variable from your shell and create a context for accessing the Eyevinn Open Source Cloud platform.

const ctx = new Context();

Then we will setup the open web services that we will need.

const service = await setup(ctx);

In return we will get the open web service handling the configuration variables and a URL to the configuration service web user interface. In this web interface you can manage the values of the configurations.

  let value = await readConfigVariable(service, 'foo');
  if (!value) {
    await saveConfigVariable(service, 'foo', 'default');
    value = await readConfigVariable(service, 'foo');
  }
  console.log(`Config value: ${value}`);

We try to read a variable called foo and if it does not exists we will create a variable with a default value. We then print the value to the console.

Now let us take a closer look at the function setup().

In this function we create the open web service for managing configuration variables. An open web service created from the open source project App Config Svc available on GitHub. This service requires a Redis database for storing and accessing the values.

For the database we will then create an instance of the Valkey.io open web service that provides a Redis compatible API. We obtain the IP and ports to this instance and creates a Redis URL that we provide the application config service we want to create.

async function setup(ctx: Context) {
  const configServiceAccessToken = await ctx.getServiceAccessToken(
    'eyevinn-app-config-svc'
  );
  let configService: EyevinnAppConfigSvc = await getInstance(
    ctx,
    'eyevinn-app-config-svc',
    'example',
    configServiceAccessToken
  );
  if (!configService) {
    const valkeyInstance = await createValkeyIoValkeyInstance(ctx, {
      name: 'configstore'
    });
    const redisUrl = await getRedisUrlFromValkeyInstance(
      ctx,
      valkeyInstance.name
    );
    configService = await createEyevinnAppConfigSvcInstance(ctx, {
      name: 'example',
      RedisUrl: redisUrl
    });
  }
  return configService;
}

The functions to save and read configuration variables are written as followed. Basically just using the HTTP API that the configuration service provides for writing and reading variables.

async function saveConfigVariable(service: EyevinnAppConfigSvc, key: string, value: string) {
  const url = new URL('/api/v1/config', service.url);
  const response = await fetch(url.toString(), {
    method: 'POST',
    headers: {
      'Content-Type': 'application/json'
    },
    body: JSON.stringify({ key, value })
  });
  if (!response.ok) {
    throw new Error(`Failed to save config: ${response.statusText}`);
  }
}

async function readConfigVariable(service: EyevinnAppConfigSvc, key: string) {
  const url = new URL(`/api/v1/config/${key}`, service.url);
  const response = await fetch(url.toString(), {
    method: 'GET',
    headers: {
      'Content-Type': 'application/json'
    }
  });
  if (!response.ok) {
    return undefined;
  }
  const data = await response.json();
  return data.value;
}

This example shows you how you can integrate open web services easily in your applications and services. More examples are available in this GitHub repository.

Configuration backend service for mobile applications

To provide your mobile applications with centrally controlled configuration you need a backend service that can provide the applications with this. I developed and open sourced a backend service that provide this functionality, and this code is now made available as a service in Open Source Cloud.

This means that you don’t have to have your own cloud infrastructure to get started but you always have the option to do so as it is open source. In this blog post I will walk you through how you setup this service in Open Source Cloud.

Step 1: Create an account

If you already have an account at Open Source Cloud you can skip this step.

Head over to www.osaas.io and create a free account. Follow the procedure and create a new tenant.

Step 2: Create a Key / Value Store

To store the configuration variables we will use a Redis compatible key/value store called Valkey. This is also open source and has been made available as a service in Open Source Cloud.

There is of course nothing preventing you from using a Redis cloud service for this instead but in this post we will use services available in Open Source Cloud.

When you have logged on to the platform and created your tenant, go to browse and search for “valkey” and click on the card in the search result.

Click on the button “Create valkey” and give this instance a name. What name you choose is not important now.

Write down the IP and port found on the instance card for the Valkey instance that you just created.

Step 3: Create a configuration backend

Now it is time to create the configuration service backend. Navigate back to browse and search for “application config” and click on the card named “Application Config Service”.

Now press button “Create config-service” and enter a name of the config backend service and the Redis URL to the Valkey instance you created. Construct the Redis URL using the prefix redis:// and the IP and port you noted down earlier.

Wait until the service is ready and status “running” and then you can click on the instance card.

Insert a new configuration value by clicking on the Add new button in the top right corner. As an example we create a configuration variable called “hello” and with the value “world”.

Press create button and you will find the variable in the list.

Step 4: Use the configuration in your application

To get the address to the configuration value click on the “Copy to clipboard” icon and you can use this address in your application to fetch the variable.

As an example we can write this simple web application (entered in codepen.io):

Conclusion

You no longer need to build and host your own backend to provide the applications with configuration variables with this open source project available as a service in Open Source Cloud.